Let’s make it perfect!
Setting the Stage
For the custom fit I will need a single photo. An actual camera is the best way to get a good result; however, if all you have is a phone camera, we’ll try to make that work:
Use the best quality and resolution settings on your camera.
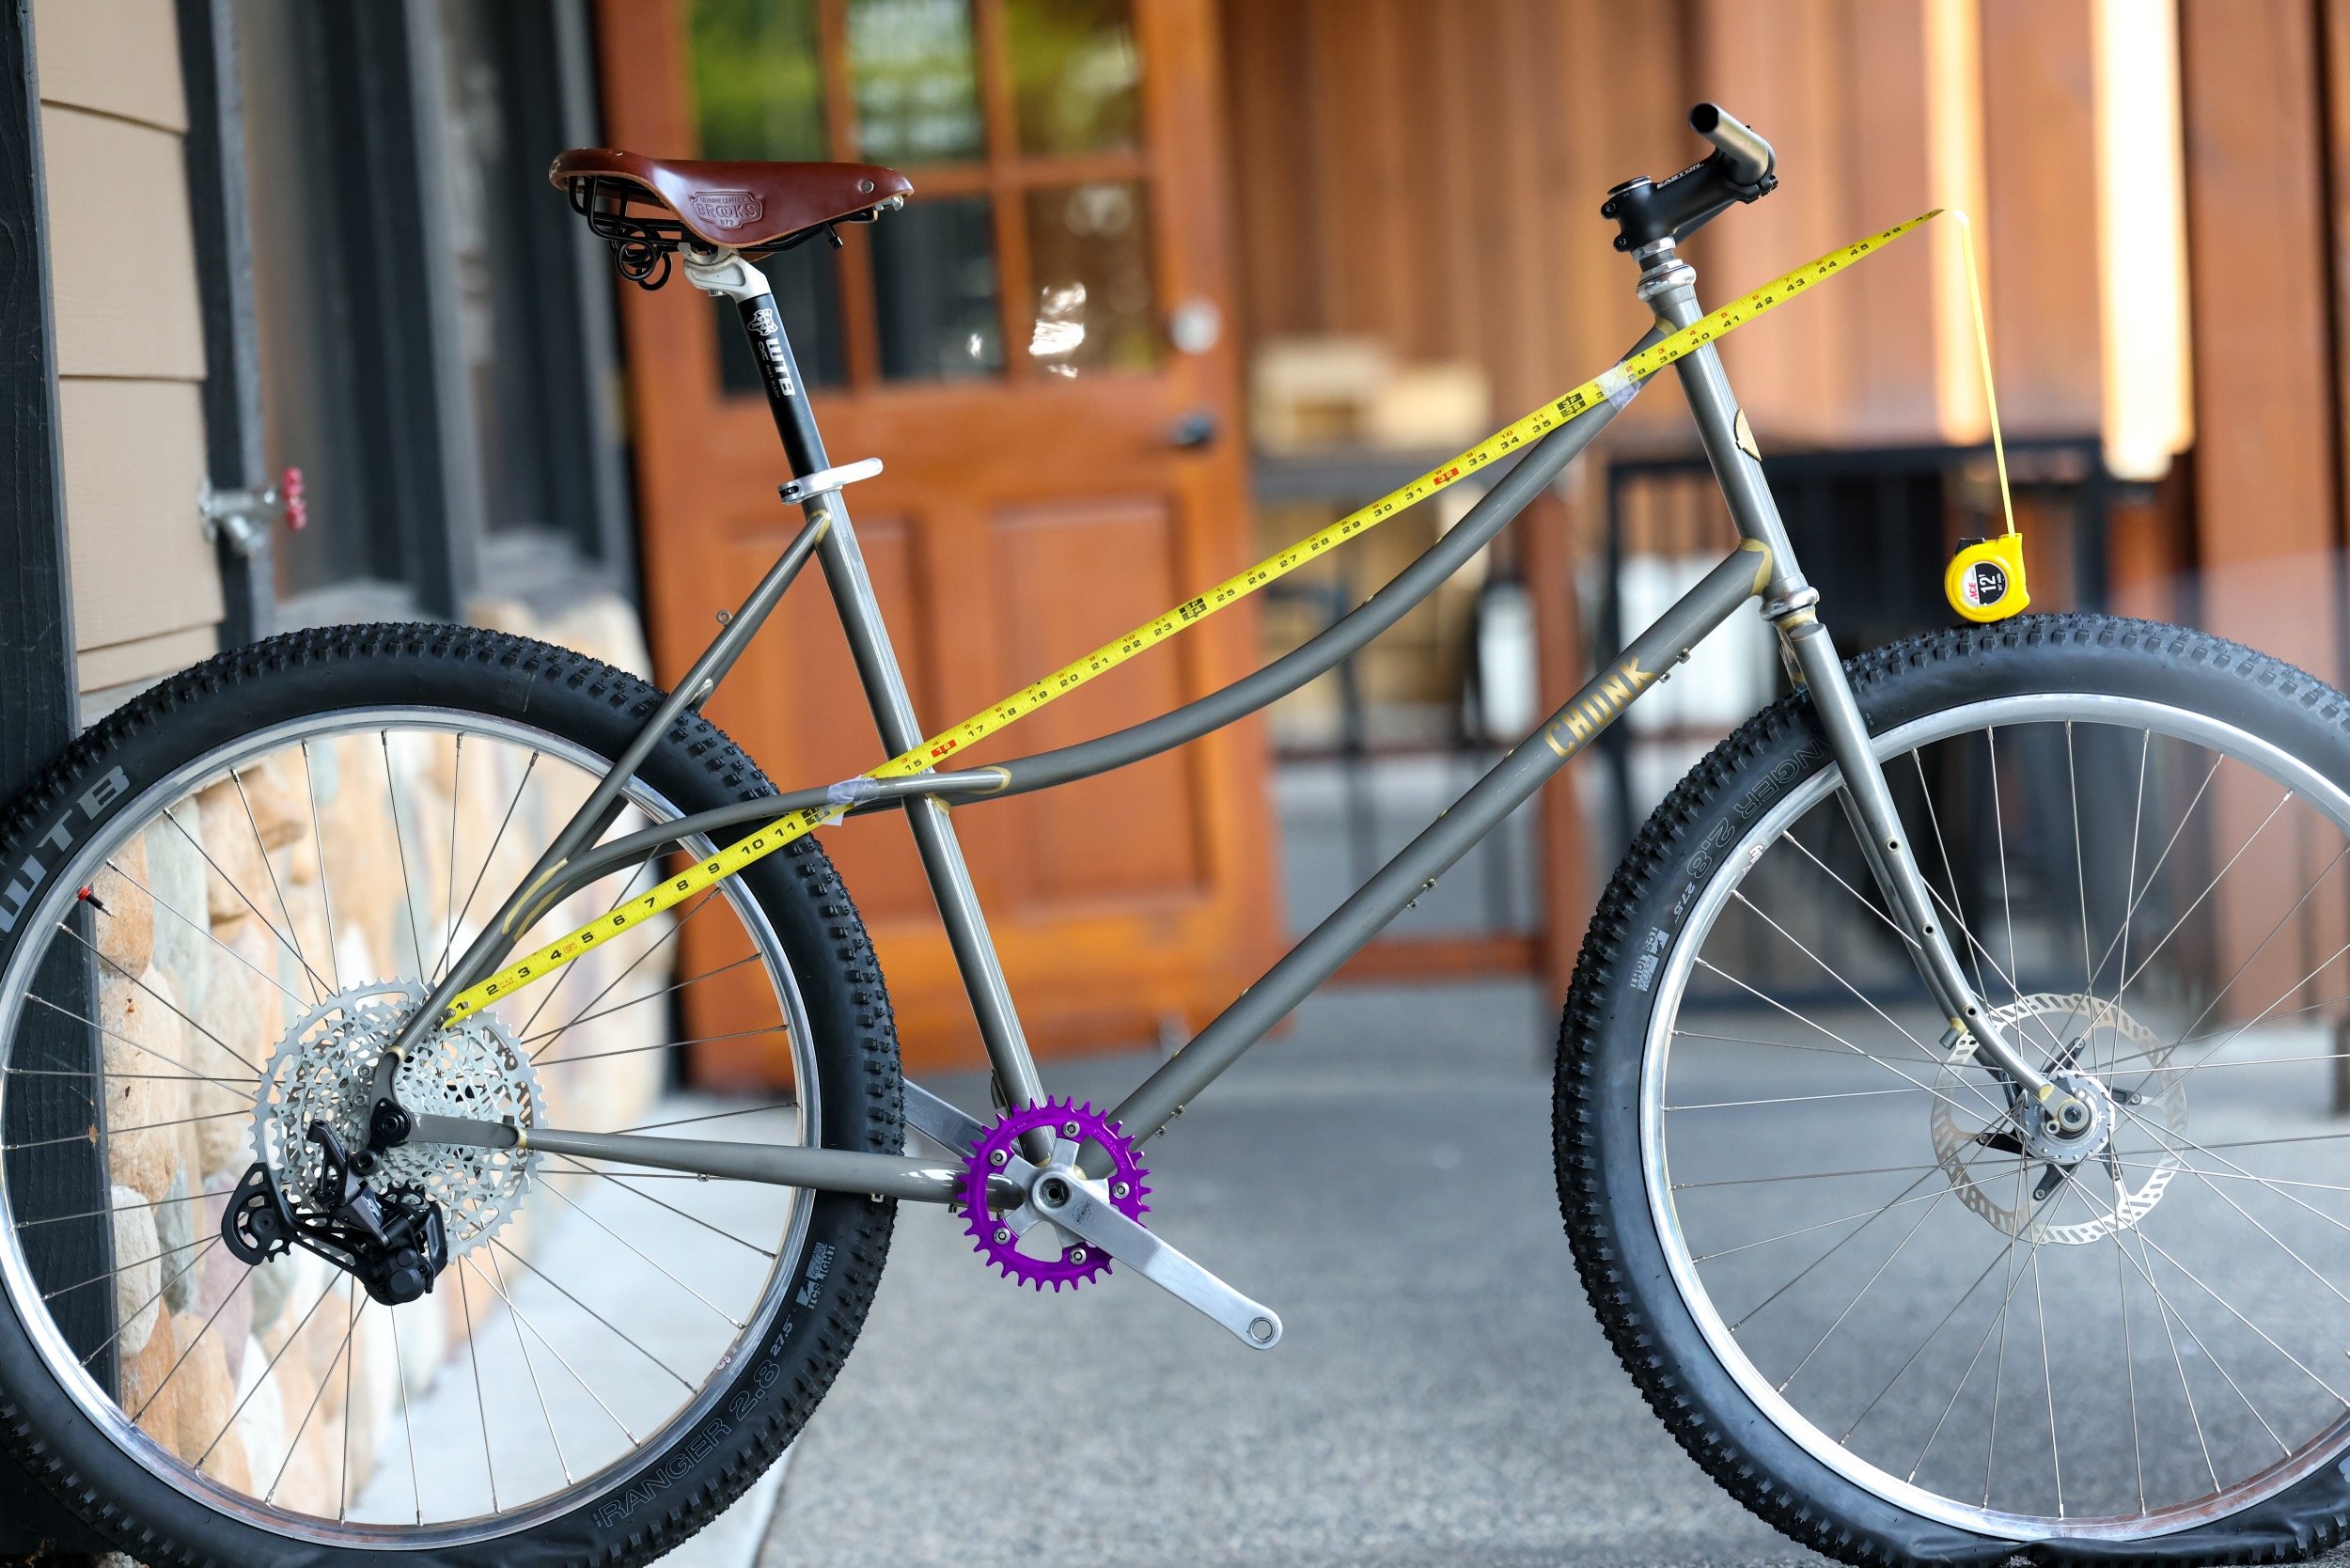
Take your bike outside and put a tape measure/ruler somewhere on the bike, preferably on the top tube.
Make sure you’re not covering up the interior lines of the frame so that I can get that perfect custom fit.
For Bolt-On
If you want a bolt-on framebag you’ll need to remove anything mounted to the bolts and unscrew the bolts halfway out of the frame.
If you have a top tube bag or anything else that straps to the frame keep it mounted and make sure the straps are clearly visible.
For Halfie
If you’re ordering a Halfie, throw the largest water bottles that you want to run in the cages so that we know how to fit the bag in the frame.
I highly recommend side-loading cages for all Halfies! They’ll allow for a significantly larger Frame Bag!
Picture Perfect
If you have followed the previous steps, you should be good to go!
Back up about 15’ from the bike and kneel down or use a tripod to make sure the camera is centered on the frame.
Make sure both tires are visible in the photo and snap a picture.
Ultimately, what I need to see is the chain stays, seat stays, and fork legs to appear as one stay or leg, like in the example photo below!
Ready to Go!
Once you have your photo, and it looks like the photo below, go ahead and email it to me! Make sure to include your name and order number.
I’ll let you know if I need something different from what you send, and remember, I only need one photo if it follows the guidelines above!

